
A leather sheath is a great way to protect your items from harm and makes them accessible when you need them most. You can choose between a pocket watch, compass, or even a cell phone case if that’s what fits best with your design of yours but there are other choices available as well. If it’s not too much risk then just substitute ” knife” wherever word has been made about cutting tools.
Multi-tools are ideal to keep on hand at all times. They come in a variety of sizes, so you don’t need to have an entire case dedicated to them, but some people prefer to carry widgets over knives because they have a tendency to get heavy due to their wrists.
Materials and Tools Used
- Medium-weight leather (5 to 6 ounces)
- Knife or rotary cutter
- Pencil
- File folder cardboard
- The Rowel
- Fid
- Groover tool
- Thread or sinew waxed
- Needles for stitching leather
- Pie a pan of water
- Spring clips
- Saran wrap
- Dishtowel
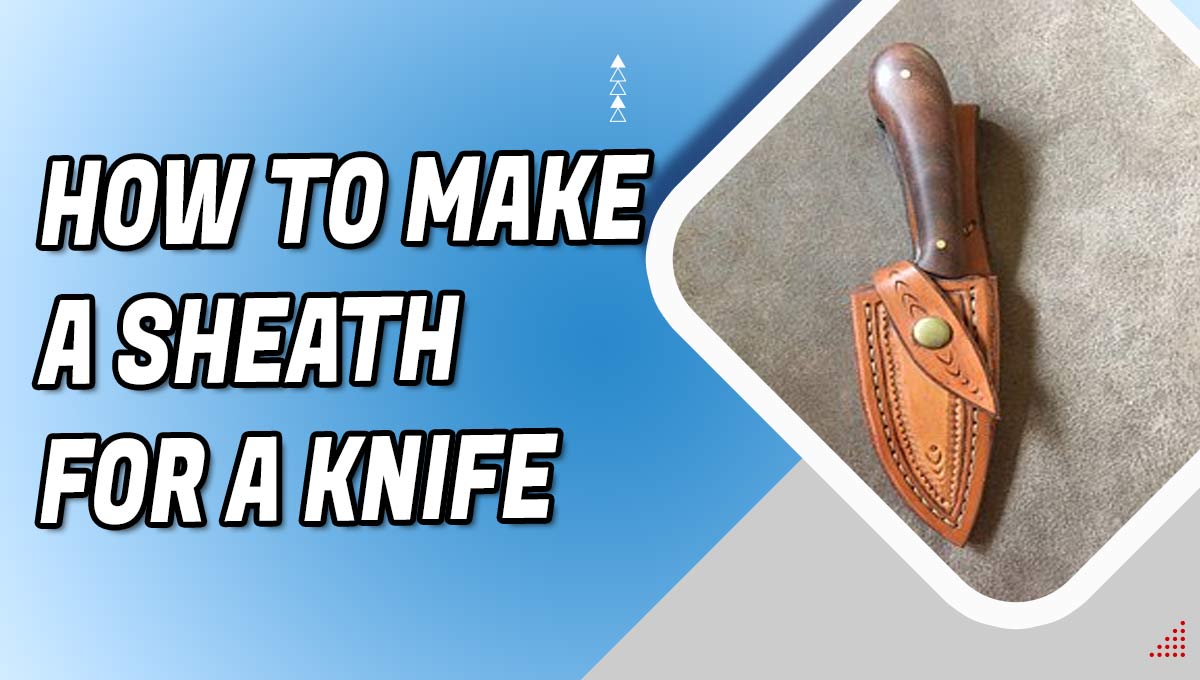
What is the best way to make a Leather Sheath?
Step 1: Draw Your Pattern
Trace around the blade and as much of a handle as you want to cover with your sheath. This is not symmetrical, because one side has an extension that will eventually be folded down into place for repair onto belts or other straps through which they can hang comfortably at all times without worrying about losing them.
Step 2: Assemble Your Pattern And Cut It Out
The pattern needs to be folded in half along the line that will form the back of the blade part as soon as you become comfortable with the folding process. Any overlap should be trimmed off. When you push the paper against the design edges, you can see where the crease or bend is located; if there isn’t enough space between the edges of cardboard/metal before bending, then cut out this section as well.
Step 3: Trace And Cut Your Leather Piece
Tracing your pattern onto the wrong side of the leather (the fuzzy suede part) is a great way to get started with crafting. The best thing about doing this step early on in drafting projects? You only need one piece from which all other pieces will be cut–so it’s not like you’re wasting any time or materials! To trace patterns, simply follow these simple steps:
Step 1: Form The Leather
The leather of your blade must be pliable. It should also have some give when pressure points are applied for it to feel comfortable during use and not too stiff or dry from being left out overnight before assembly can finish up with patting on its exterior where clips are absent so they don’t scratch against their surface while fitting together seamlessly without any gaps visible at first glance; this will ensure more successful grip than if you were using one made entirely by hand due both limitations concerning shape.
Step 2: Trim And Stitch The Sheath
To install your new sheath, you’ll need to trim the rough edges and follow its contour. This means that there are two layers of leather in contact with each other which have been water-hardened so they’ll take more pressure than normal humans put on them! Go slow – don’t cut yourself while doing this tutorial step-by-step guide.
To attach an edge or tip from another tool such as awls/gouges: using a small mallet tap firmly against it until the hole lines up correctly.
Step 3: Attach The Belt Loop
When all the preparations have been made, it is much easier to sew the belt loop now before stitching up the sheath since you have everything ready. When assembled with other components later down this process, there will be less risk for snags or lumps that could cause issues during use (ease). Adjust the size as desired and trim away excess cloth if necessary.
Step 4: Sew The Seam
What’s the best way to start a seam? Right from where you want it! For example, if your project requires an inner lining and outer leather exterior with stitching along all four sides then this is how we would go about doing it. The first step in getting ready for our completed task at hand involves using either single or double needles depending on what kind of fabric content there will be within said materials.
Step 5: Insert A Knife Or Other Object
You should feel a snug fit of your knife on the belt. This is because it will loosen just slightly over time and with use, giving you that proud satisfaction as well.
Conclusion:
A knife sheath is a protective covering for knives. Sheaths can be made of leather, plastic, or metal and come in many shapes and sizes. They are an important part of your outdoor gear and should be chosen to fit both the style of your knife and the way you plan to use it. A quality sheath protects the blade from damage and makes it easier to access when you need it most. There are many different types of sheaths on the market today, so take your time and find the one that’s right for you.
